Dealing with a broken or stuck light bulb base can be frustrating and dangerous. If you don’t do it the right way, you might get an electric shock, cut yourself on the glass, or mess up the light socket. But, with some common tools and the right precautions, you can get the base of the light bulb out safely.
To remove a broken or stuck light bulb base safely, make sure the power is off. Then, use a pair of needle-nose pliers or a potato to turn the part that’s still in the socket.
Removing a broken light bulb base can seem scary, but you can do it fast and safely if you follow this method. Most important, make sure the power is off. You don’t want to get hurt because you’re messing with the socket and there’s electricity running through it.
Why Is It Important to Handle Light Bulb Removal Safely?
Removing a stuck or broken bulb without turning off the power can be dangerous. Sockets still connected to an active power source can lead to electric shocks. Moreover, working with broken glass increases the risk of cuts and other injuries. By taking the proper precautions, such as turning off the power and using protective gear, you ensure your safety and the integrity of the light fixture.
Tools and Materials You’ll Need
Before starting, it’s essential to gather the necessary tools and protective gear. You will need:
- Needle-nose pliers: These are ideal for gripping the edges of a broken base.
- Gloves: Protect your hands from sharp glass or metal pieces.
- Eye protection: Broken bulbs can release glass shards, so eye protection is a must.
- Electrical tape: Optional, but helpful in securing sharp edges of a broken bulb.
- A potato: Surprisingly, this common kitchen item is a great alternative for removing broken bulb bases!
With these items ready, you can begin the removal process.
Step-by-Step Guide for Removing a Light Bulb Base from a Socket
- Turn Off Power
Safety should always come first. Make sure to turn off the power at the breaker box or unplug the fixture if possible. This ensures no electricity is flowing to the socket, reducing the risk of electric shock. - Wear Protective Gear
Put on a pair of gloves and eye protection. Gloves will protect your hands from broken glass, while eye protection shields your eyes from any potential shards that could fly off when handling the bulb. - Use Needle-Nose Pliers
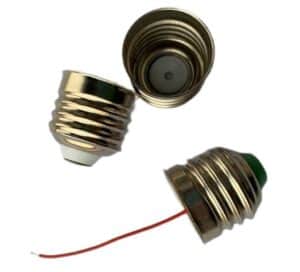
With your gloves on, carefully grip the edge of the broken bulb base using the needle-nose pliers. Slowly twist the base counterclockwise. The pliers allow you to grip the small edges of the base without damaging the socket itself. Apply gentle pressure to avoid breaking the socket or damaging the fixture. - Use a Potato as an Alternative Method
If you don’t have pliers, a potato can be an excellent substitute. Cut a potato in half and press it firmly into the broken base. The soft yet firm texture of the potato grips the metal edges of the bulb base. With the potato secured, gently twist it counterclockwise to unscrew the base from the socket. This method works particularly well when the bulb is broken close to the base and the pliers cannot reach. - Check the Socket
After successfully removing the bulb base, inspect the socket for any remaining debris or damage. Ensure that no metal or glass pieces remain inside, which could affect the connection of the next bulb. If the socket is damaged, it might be best to replace it before installing a new bulb to prevent further issues.
Troubleshooting Common Issues When Removing a Light Bulb Base
In some cases, the broken bulb base may not turn easily or at all. Here are a few troubleshooting tips:
- Base Won’t Turn: If the base is particularly stuck, applying a bit more pressure with the pliers or potato can help. However, be careful not to twist too hard, as this could damage the socket. If the base remains stuck, you may need to use a small amount of penetrating oil to loosen it.
- Corroded Base: Over time, light bulb bases can become corroded, especially in humid environments. If corrosion is preventing the base from turning, apply a small amount of penetrating oil to the base and wait a few minutes for it to loosen. After waiting, try again to twist the base out of the socket.
Once removed, make sure the socket is clean and ready for a new bulb. Corrosion can be a sign of moisture buildup, so it’s wise to check the surrounding area for leaks or other moisture-related issues.
Preventing Future Stuck Light Bulb Bases
To avoid facing this frustrating problem in the future, take some preventative steps whenever installing a new light bulb.
- Use Anti-Seize Lubricant
Applying a small amount of anti-seize lubricant to the threads of the new bulb can help prevent it from sticking in the socket. This is especially useful in fixtures exposed to moisture, such as outdoor lights. The lubricant creates a protective barrier that helps the bulb unscrew more easily later. - Regular Maintenance
Light bulbs often get stuck because they are left in the socket for too long, sometimes even after they’ve burned out. It’s a good practice to regularly check and replace old bulbs, even if they haven’t completely burned out yet. Regular maintenance of the light fixture, including cleaning the socket area, can prevent corrosion and sticking.
Final Words:
You can remove a broken or stuck light bulb base safely and easily if you follow the steps and use the right tools. If you take these precautions, you can change light bulbs in the future without any problems.


